

How To Get Rid Of White Halo In Photoshop
Eliminating Halos in Photoshop
This Eliminating Halos in Photoshop Article is by Chris Frost | Landscape photographer of the year 2020 . If you lot would similar to write for usa, delight read here.
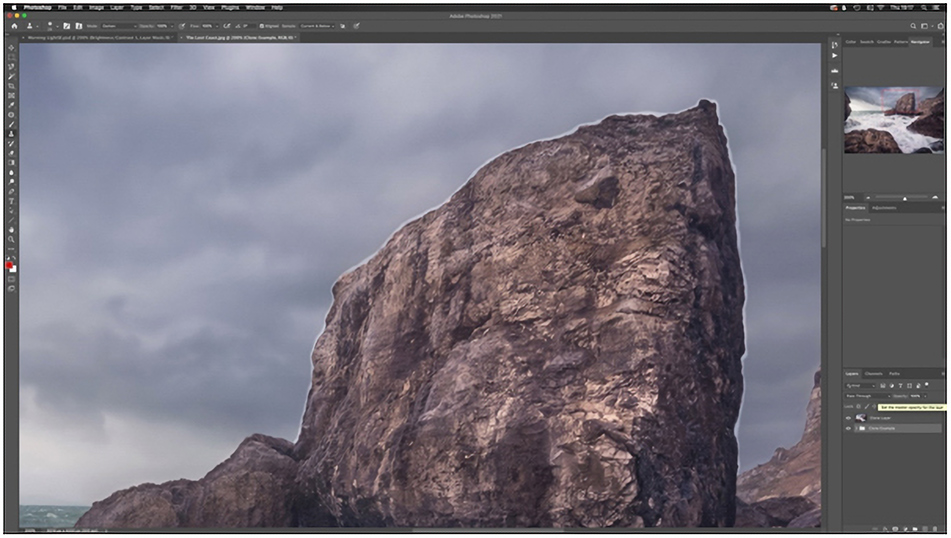
Many of us have been in that location earlier. Subsequently finally finishing the processing of an image, a feeling of satisfaction floods in as you proudly view your finished piece merely to find a small withal cruddy white halo snakingly perfectly around the transition zone betwixt foreground subjects and gloriousgolden hr skies – a distraction that once seen, cannot be unseen.
Whilst these processing halos can be attributed to a number of scenarios, such as over sharpening high contrast areas (trees/rocks against sky areas), over enthusiastic particular recover or equally a by-production of HDR packages, it can as well be seen when exposure blending slightly misaligned images.Exposure blending allows us to effectively, and with fair ease in nearly cases, solve cameras' inherent inability to handle vastly differing levels of light across a scene – particularly for gilt hour images where vivid colourful skies are often numerous stops of light brighter than foreground details devoid of direct sunlight. Equally exposure blending has become more prevalent in contempo years, and so too has the presence of halos.
Whilst the event is best addressed at root, oft the haloing volition but get obviouslyapparent once the image has been processed further with contrast and colour added to the paradigm. This article details the steps required to quickly address this problem and return your images to their intended celebrity; a task just achieved with Photoshop's Clone tool set to Darken mode.
Additionally, and specifically for those sharing my passion for woodland photography, this clone tool fox tin can also exist used to remove those unsightly petty areas of sky that always manage to summit though the foliageno affair how hard you try to negate them when composing the epitome. The second role of this article details how to handle these ofttimes-unavoidable annoyances.

-Tutorial Continued Below-
Enter your email below and join our customs of more than 100,000 photographers who receive regular tutorials and accept also

Subscribed to our newsletter,
Downloaded our Gratuitous Photoshop Course
Got our FREE Piece of cake Panel for Photoshop
And accept our FREE Essential Guide To Luminosity Masks E-Book
Prepping The Prototype For Removing Halos in Photoshop
Before commencing the clone work, a pixel layer volition need to be created which will be used for the choice of replacement pixels and any cloning undertaken.
1. On a Mac, hitting Command-Option-Shift-E (for Windows use Shift-Ctrl-Alt-East ) will create a postage visible layer on tiptop of the stack ready for the cloning work.Always ensure that this is selected every bit the Agile layer.
 | An important point to notation. The layer opacity should be set to 100%. Having this at a lower opacity will event in whatever cloned changes only beingness partially visible which may lead to undesirable ghosting furnishings. |
2. For ease of reference, rename the new Clone layer with a suitable description.
3. From the Photoshop Toolbar, choose the Clone Postage stamptool.

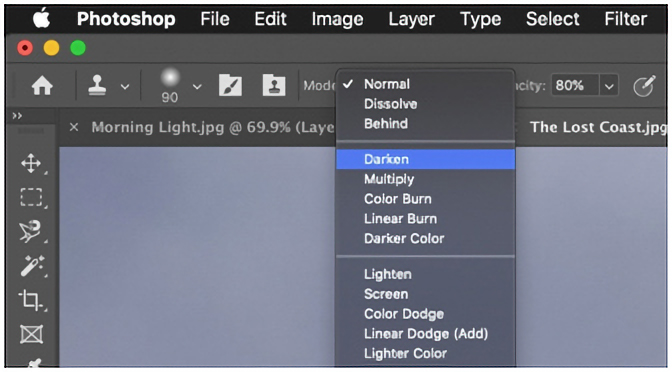
4. Modify the Manner to Darken and ensuring that the Aligned box is likewise checked.Setting the blend mode to Darken changes the way in which Photoshop allows Clone Postage corrections to be fatigued in. InDarkenMode, Photoshop will just permit changes to areas where tones are lighter than those from the sampled source area. Therefore, the darker areas of the sky from around the sample point and the darker horizon area (rocks/trees) will remain untouched whilst simply the lighter halo area will be affected by the Clone tool corrections.
5. Change theSampleoption to Current Layer and Below.

half dozen. The side by side pace is personal preference. For those preferring to make the changes in one cruel swoop, set the Opacity to 100%; those wishing to build up the consequence/corrections more than gradually should cull an Opacity around 50-lxx%.

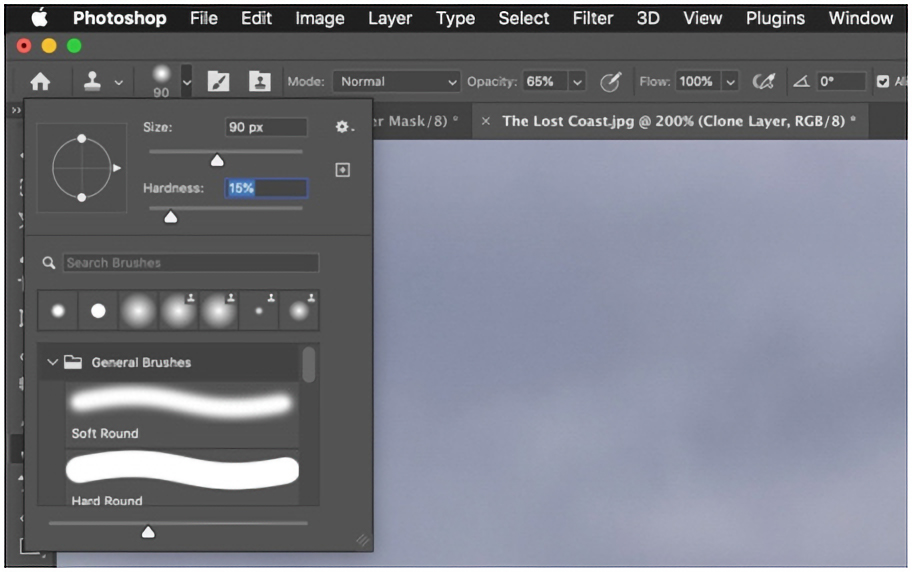
7. Finally, set the brush hardness to a low value;a valueunder25% works well and allows for like shooting fish in a barrel control of the corrections existence draw in – this will instruct Photoshop to clone with a soft edged brush. Using a higher hardness value tin lead to transitions beingless smooth.
Correcting the Halo – Eliminating Halos in Photoshop
1. We're now ready to correct the halo. Using the Clone tool, depress the Option key (Alt for Windows users) and left click to select the area you lot wish to source pixels from; this should be located shut to the halo surface area and be made upward of colours and tones that will blend seamlessly with the destination location.
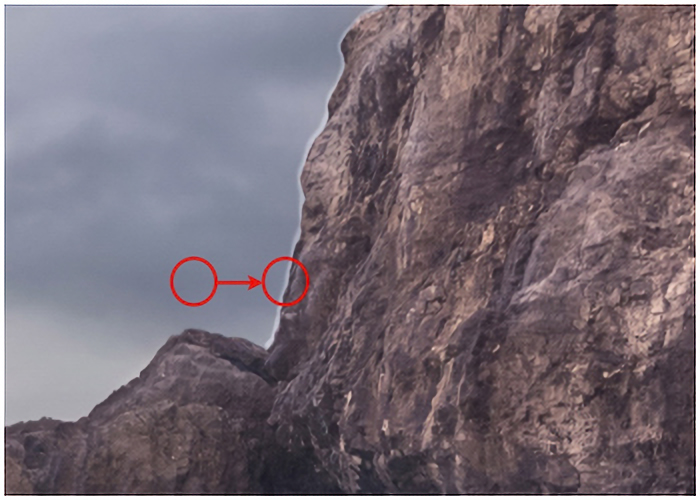
2. One time happy with the source pick, get-go brushing over the destination area with the clone postage stamp, replacing the light halo pixels with those from the source expanse and building upwardly the issue so that the halo is removed with a seamless transition.When correcting a horizon line, simply choose a source above and in shut proximity to the halo line, before painting beyond the whole halo. Photoshop will motility the source pixels in relation to the destination so whatsoever change in pixel tone, colour or content should exist reflected as you lot pigment beyond the halo expanse. For more complex halos, resample the source data frequently; this volition allow for a more than natural and conceivable correction.
3. With DarkenMode selected, Photoshop volition only let corrections to areas where tones are lighter than those from the sampled source area – this should protect foreground details from existence impacted by the clone activities.
4. In about cases, the steps detailed above volition deliver clean and easily achievable results. However, in that location will be scenarios where a little extra endeavor is required to complete the procedure. In that location may be instances where the corrected sky has uneven patches which tin can exist easily corrected, resampling moresuitable source areas earlier re-cloning over the problem areas. In the rare instances where the clone corrections have bled over into the foreground, these can be quickly masked out by adding a Mask to the Clone layer and painting over trouble areas on that mask with a black castor.
Correcting 'Dark' Halos – Eliminating Halos in Photoshop
Whilst light halos are more than commonly seen, there will be exposure blending faux pas where foreground elements, such as rocks, may showroom a darker ring around their outer edges – typically, a result of the blend allowing too much of the darker sky expose to bleed into the foreground exposure. Correcting these instances should be no different than for the heaven, with ane modest alter in the processing steps detailed previously. Rather than changing the Clone StampMode to Darken (step four), in this instance the Mode should be changed to Lighten .
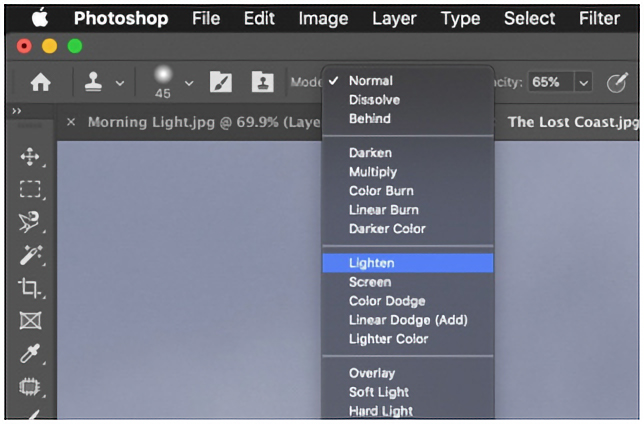
Changing the alloy style to Lighten changes the fashion in which Photoshop allows Clone Stamp corrections to be drawn in. With Lighten selected, Photoshop will only permit changes to areas where tones are darker than those from the sampled source area. Therefore, the lighter areas of the heaven will remain untouched whilst the dark halo area of the rock iscorrected. This correction tin can be achieved by sampling from correctly exposed areas of the rock/foreground tothen cloning over the dark halo areas.
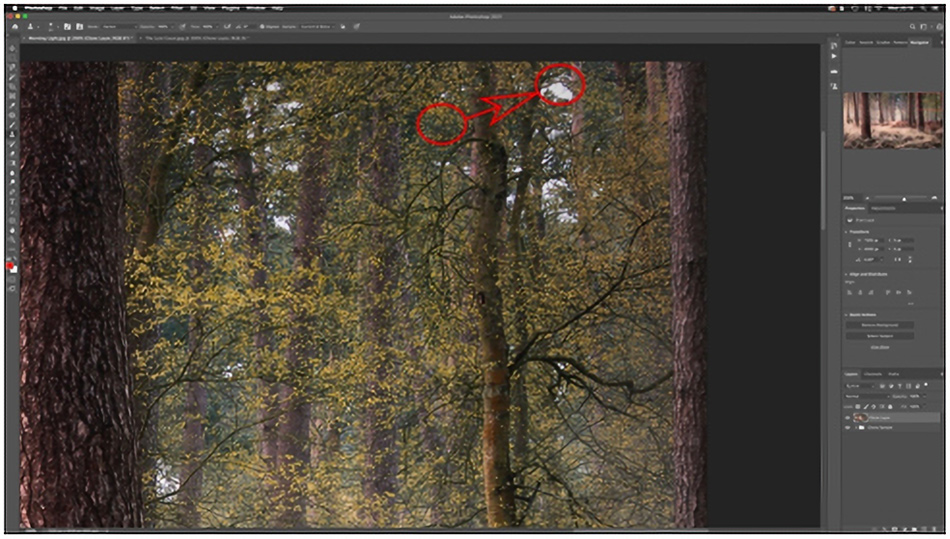
Woodland Tidy – Eliminating Halos in Photoshop
The same principles apply when working with woodland imagery, but the application will be slightly dissimilar. In some cases, specular highlights bursting through the canopy volition add to the atmosphere and experience of an paradigm only there may be instances where little gaps in the canopy detract from the overall image, distracting the eye from key elements. Cloning foliage into these bright areas can reduce distractions and help develop a feeling of containment, of being completely enclosed by the woodland.
Steps 1 to 7remain the aforementioned as detailed in the Halo section to a higher place.
1. From at that place, rather than choosing source pixels in shut proximity, cull from an area having similar foliage color, luminosity and coverage for the area to exist corrected. Where possible, expect to avoid areas that contain branches and tree trunks; cloning branches into the sky areas will look bad-mannered and unnatural unless they are subtly blended into existing trees.
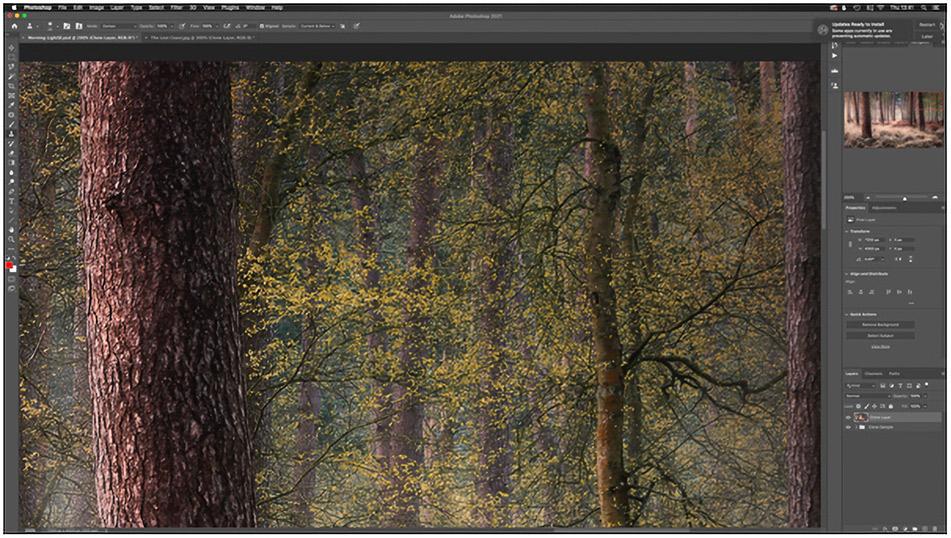
2. Once happy with the source choice, alter the castor Opacityto 100% and start brushing over the destination area filling the sky areas with the chosen foliage selection. Selecting an Opacity of 100% will avoid any semi cloned areas that will leave ghosting issues.For larger areas, information technology is oftentimes advisable to resample the source data frequently which volition allow for a more natural and believable correction.
3. Again, use of the Darken mode will restrict the painting in of the called foliage to areas of lightness – in this instance the exposed heaven. This should protect the tree details around that surface area from being impacted by the clone activities.
4. In nigh cases, the steps detailed to a higher place will evangelize make clean and hands achievable results; however, there volition be scenarios where a little extra effort is required to complete the procedure. There may be some instances where the corrections spill over into next tree trunks leaving ghostly leaf shapes – this can be easily corrected. Simply resamplean area of the tree trunk in close proximity, before cloning over the trouble surface area(s) ensuring that the cloned in tree trunk border is aligned with the original epitome. Alternatively, add a mask to the layer and using the Brush tool set to black, paint over the area of concern to mask the unwanted changes out.
A very simple process, but one that is effective and like shooting fish in a barrel to use and can speedily save an image, or in the case of woodland images, remove unwanted distractions and add to the images touch on.

Images from Chris Frost | Landscape photographer of the yr 2020
Writers Accolades – Chris Frost
Awards:
– Winner – Great britain Landscape Photographer of the Year 2020 – Woolland Wood
– Winner – Snapping a Twig (Woodland Trust photo competition) 2020 – Fallen
Thank y'all for reading this article on Eliminating Halos in Photoshop, be certain to sign up for our newsletter for more tutorials and great offers.
Enter your email below and join our community of more than 100,000 photographers who have too
Subscribed to our newsletter.
Downloaded our FREE Photoshop Course.
Got our Costless Like shooting fish in a barrel Panel for Photoshop.
And, accept our FREE Essential Guide To Luminosity Masks E-Book.
Offering Ending Soon – Claim An Extra 25% Discount Today
Source: https://www.shutterevolve.com/eliminating-halos-in-photoshop/
Posted by: boulangerlosoutypery1946.blogspot.com
0 Response to "How To Get Rid Of White Halo In Photoshop"
Post a Comment